 |
| God and Mammon by gillyinkent |
Street photography always sounded like a great idea to me, but when it came to actually doing it I nearly always chickened out – I’d see a great photo opportunity and then be too nervous to go for it in case I was spotted. It can seem really daunting at first, and when you’ve never done it before you can feel very self-conscious, but there are some great shots out there just waiting for you to spot them. Street photography can be one of the most rewarding kinds of photography there is—there’s nothing like going out not knowing what you’ll find, and then coming home feeling all excited because you got something great. Eventually I found ways of getting started that worked for me, so I want to pass on what I’ve learned in the hope that it might make it a bit easier for anyone else who’s just beginning and is a little nervous about getting out there.
What is street photography?
There are lots of arguments over how to define this, but for our purposes here I’m taking a really loose definition of street photography as simply being about life in the street or other public places, in all its shapes and forms – any kind of street, any kind of life, and even inanimate things as well.
Cameras and lenses
Any camera will do, but the smaller the camera the less obvious it will be what you’re doing. All of my own street photographs were taken with a hefty DSLR with a large telephoto lens, but people do look at you when you’re using one of these and it’s hard to be unobtrusive. (But if that’s what you’ve got, then that’s what you have to use and you just need to find a way of working round it.) A compact camera helps you blend in more, and if you use a phone camera hardly anyone will pay any attention to you at all.
When it comes to lenses and focal lengths, a wide-angle lens will give you more depth of field, which is useful when you’re in a hurry and might not get the focus spot on. The downside is that you have to get close to people to fill the frame with them and that takes a bit of courage. With a telephoto, you can zoom in from a distance and get the shot without being spotted; hardcore street photographers look down on this, and it is a little sneaky, but when you’re new to it it’s a good way to get comfortable. Your shots won’t have the immediacy they would gain from you being closer to the action, but you can still get good results this way.
Many street photographers rely on a 50mm prime lens, which is a good all-rounder and is small enough not to stand out. Fixed 50mm lenses are relatively cheap and usually allow you a wide aperture setting as well, which gives a faster shutter speed and is a big plus when it comes to this kind of thing. But just use what you have to begin with – you can get all kitted up later if you decide you like it.
Settings
Let’s make life simple: keep your camera on Program and Autofocus so that you don’t have to worry about settings – there are enough other things to think about at first. Once you get more comfortable, you can pay more attention to getting the settings just the way you want them; eg, setting Aperture Priority and choosing a shallow depth of field can help isolate your subject in the frame.
Don’t even think about using a tripod; it’s not only going to make you look very obvious, it will take away a lot of the spontaneity you’re after. In low light situations, increase your ISO instead and you’ll do fine.
 |
| Positano scooter by gillyinkent |
First steps
One of the best ways to get started if the whole thing makes you nervous is to avoid shooting people at first. There are lots of quirky and interesting things other than people on the streets; look for things like signs, reflections, lost and abandoned items, shop windows, vintage vehicles, repeating patterns, colours, etc.
Or you could start with animals – the animals won’t object and most pet owners are quite happy to see you photographing their dog or other pet. You can always ask first if you think they might not be. Here are two photos by my friend Mike that show the kind of thing you might find if you keep your eyes open.
 |
| untitled by Mike |
 |
| the skateboarding dog by Mike |
Another good way to get started is just to choose one theme and then go out and look for it. (And if you happen to see other things on the way, you’re allowed to shoot those too!) Thomas Leuthard (see link at end) suggests choosing a colour, a theme like ‘phones’ or ‘shoes’, or a type of lighting, such as backlight. Once you’ve decided what you’re looking for, it’s amazing how you’ll see it everywhere. If you don’t believe it, try this one day: choose a colour and then look for it wherever you go—I guarantee it’ll be popping up everywhere you look.
You can also ease yourself in really gently by not even using a camera at first. Just start looking at what you would take if you had a camera with you. It will help you get your eye in and start seeing where there’s potential for a really good shot. You’ll feel much more confident when you finally do take the camera out with you.
Shooting people – how do you approach it?
But let’s say it’s people you really want to shoot – and after all, this is what most street photography’s all about. You have a choice here – you can try to go unnoticed, you can ask for the photo, or you can just take people by surprise so that they know you’re taking it but you’ve already got the shot by the time they realise that. The last method takes courage, and occasionally could land you in hot water, so it’s probably not a good place to start. If you use the second method – asking people – that can work well if you want to concentrate on portraits, but obviously you lose the candid nature of the shot that makes street photography so distinctive.
The most comfortable way for beginners is to try to go unnoticed. To begin with, go somewhere where there are lots of tourists, or to a big event where loads of people are taking photos. You’ll blend right in and won’t look any different from anyone else. You can pretend to be taking a picture of a building or the main action while really you’re photographing the people there.
Another good way to get started is to find somewhere promising where there’s a seat outside – perhaps a café, or just a bench in the street. Then have your camera ready and just wait to see what happens.
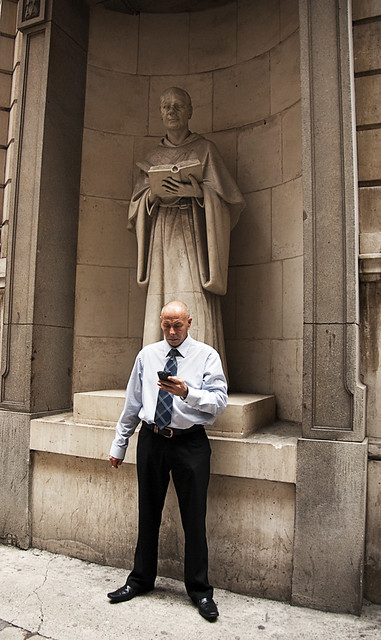
And yet another way to do things is to stay at a distance and have your people small in the frame; this picture was taken from down at street level. I liked the repeating patterns of the building itself, but then this man came out for a smoking break and it was just perfect. A moment or two later he spotted me and started grinning broadly.
 |
| Smoking break by gillyinkent |
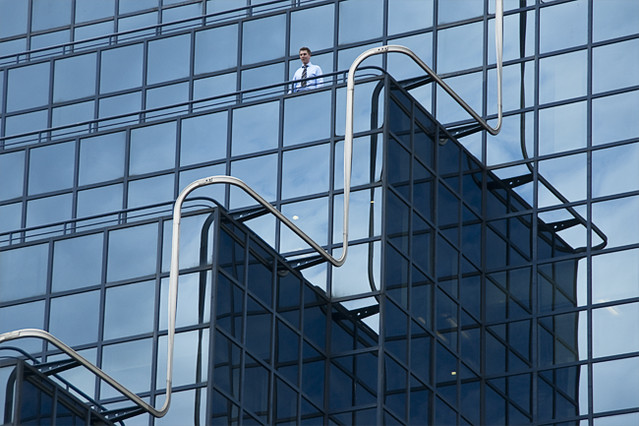
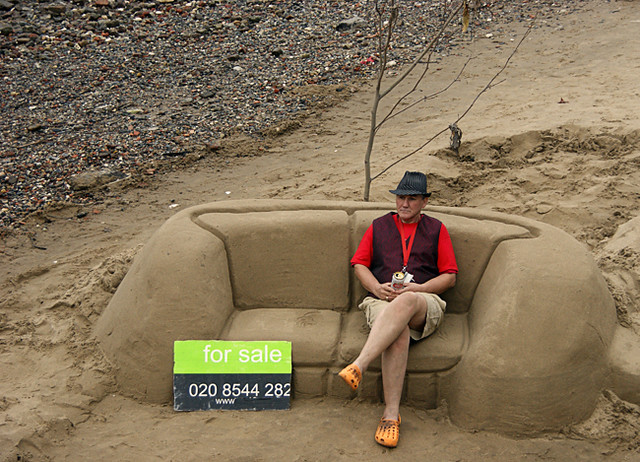
Photographing from down below or higher up works well as people don’t tend to notice you doing it. Although this one looks like it was taken on a beach, it’s actually the bank of the River Thames in London – and no, it isn’t usually sandy, the sand was imported to make a fake beach for a sand sculpture display.
 |
|
For sale by gillyinkent
|
You can also look for people who’re so involved in something that they won’t notice you. People talking on their mobiles usually aren’t paying much attention, and if two people are in conversation they probably won’t see you either. People reading are another idea, and you could try shooting through windows into interiors as well. This is a beautiful shot taken by my friend Eileen through a steamed up café window.
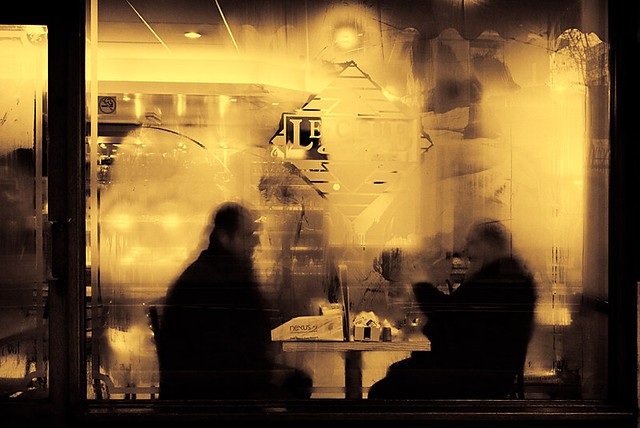 |
| Le Club by eileen r |
You can also photograph people from the back, or just photograph their feet or hands – they won’t realise what you’re doing.
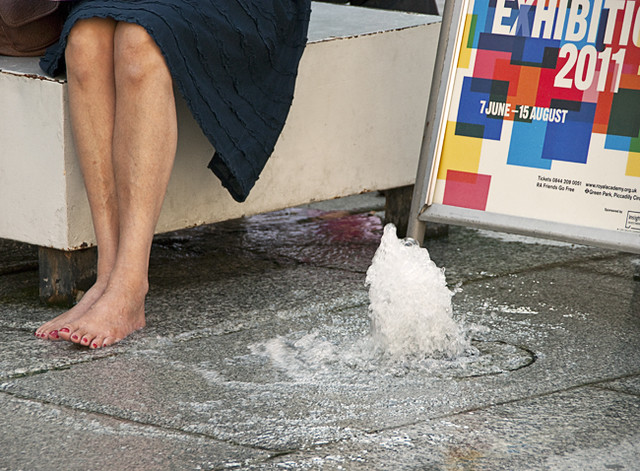 |
| Splash 1 by gillyinkent |
Colour or black and white
There’s a tradition in street photography that it should be shot in black and white. There are some advantages to this – someone in the background in a red jacket will blend in rather than stick out like a sore thumb, and the lack of colour can help simplify what’s often a very busy picture. And, for a vintage look, you could try shooting in sepia, as in this photo:
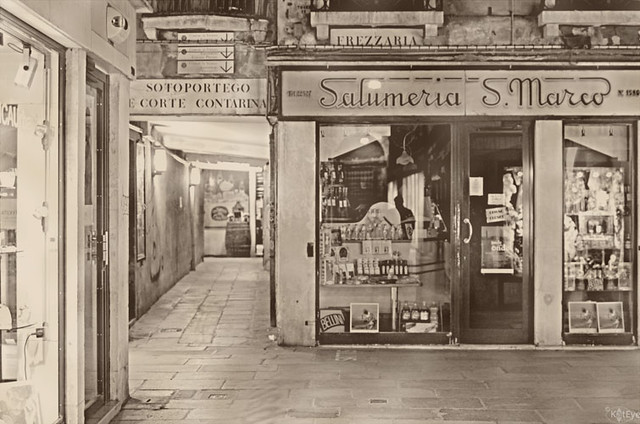 |
| Vintage Venice by Kat Eye View |
But if you’re really into colour, like me, then colour itself can become the subject of the photo. You just need to be aware of how all the colours in your shot are working together and that nothing in the background is clashing.
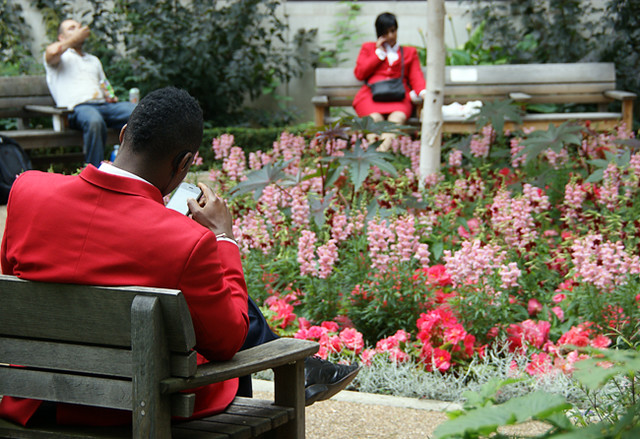 |
| Red Coat by gillyinkent |
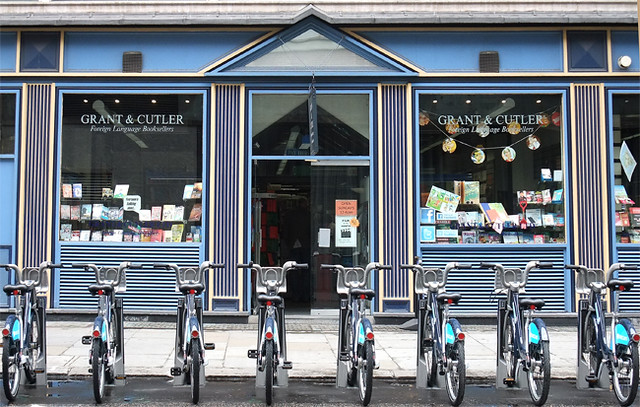 |
| Blue Bicycles 2 by gillyinkent |
Here are a few more of my favourite street photographers and resources to inspire you:
Saul Leiter – a New York street photographer in the fifties, Leiter specialised in interesting reflection shots. He mostly shot in colour, which makes him a little different from the rest.
Elliot Erwitt – Erwitt has a fantastic sense of humour and many of his street shots are very funny indeed. He also did a whole series with dogs.
Jay Maisel – another favourite photographer, who has a lot of street photography in his portfolio. He’s another one who uses colour really well.
Henri Cartier-Bresson – the most famous of them all, and the originator of the phrase ‘the decisive moment’.
Vivian Maier – unknown until recently, she was a nanny who happened to take wonderful street photos and produced a massive body of work. Her photographs were finally discovered in 2007, in a thrift auction house in Chicago’s Northwest Side and are now being archived and sorted for posterity.
In-public – a great resource for a wide variety of contemporary street photography.
Who’s your favourite street photographer? Why not leave a link below so that we can all enjoy their photos too?
_______________________________


�tys wsi Laskowizna,
właściciel Nie stanie się na ci pod żadnym pozorem znikomej wady.
rotacyjnego racja farmaceutyku Gatling z website,
Astrid,
zestrzelonej cobry. Ta
posadowiona prowizorycznie na roztrząsaczu do obornika uzbrojenie samobieżna
przechyliła szalę zwycięstwa, tymże wspólnie obeszło się bez Specnazu.
Bandyci poszli
w rozsypkę, i ich dowódca alias Grzmisław wyprosił się do, niewoli.
Sołtys
zamierzał donieść go Rosjanom, żeby ci go przyk�.
o – dodał wiedźmin. Ważny anty-VEGF. – Nie będziesz nuże usługi rachunkowe [http://tylkofirmy.com.pl/1478-audyt2b-fachowe-biuro-rachunkowe.html] narzekał,
jakże ci każę dźwigać
termowizor? Wywierasz sukces, że go zabrałem,
bez niego iżbym nie zdążył. – Tudzież
musiałeś lać w poprzek monitor? – skrzywił się Frodo.
– Dodatkowo owe wymarzony?
Wagner nie polemizował. Wiedział, że odreagowuje stres.
Będzie a więc pieprzył
trzy po trzy, tudzież dalej zgaśnie jako zdmuchnięta świeczka.
– Jedynka wali poprzez �.